
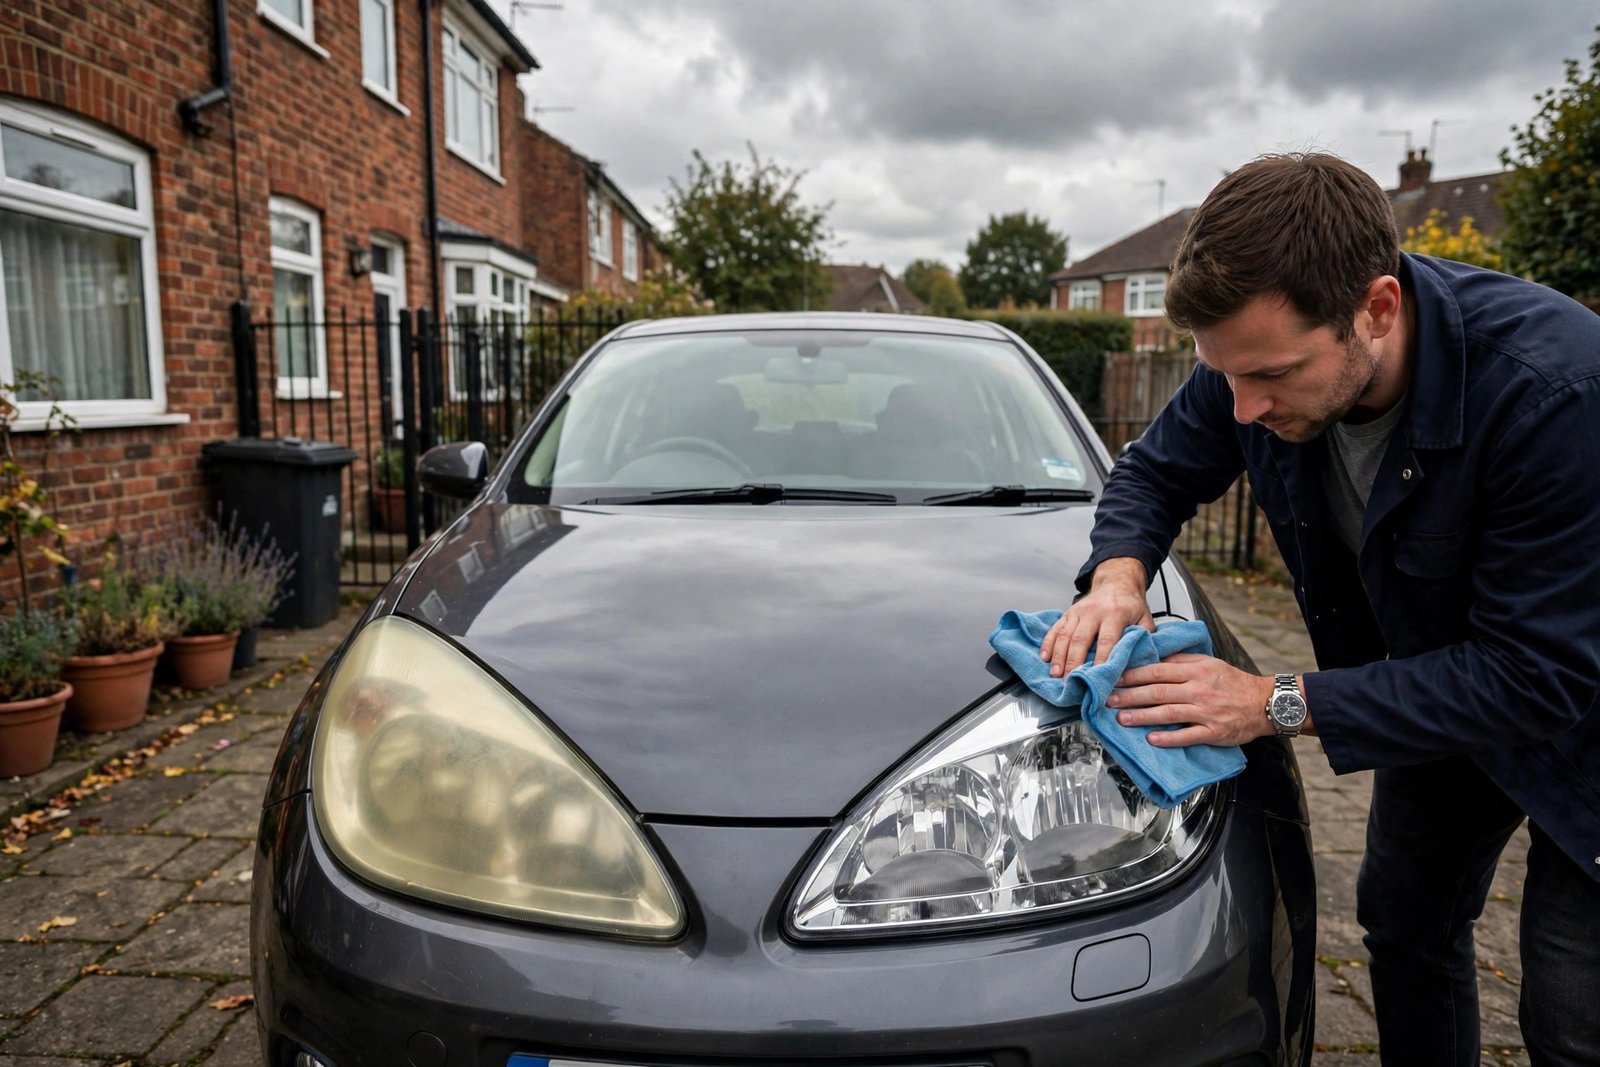
Remember when your car’s headlights were crystal clear? Now they look like they’ve been dipped in weak tea — yellowed, cloudy, hazy. It’s one of the most ageing things that can happen to a car, and it’s nearly universal on cars over 6–8 years old in the UK. The good news: yellowed headlights are almost always restorable at home for under £20, and doing it properly takes about an hour. Here’s the method that actually works — and the mistakes that make things worse.
Why headlights turn yellow in the first place
Modern headlight lenses are polycarbonate plastic, not glass. From the factory they’re coated with a UV-resistant hard coat — but British weather is relentless: UV radiation (yes, even through our cloud), road grime, salt, and temperature cycling gradually break that coating down. Once the coating fails, the raw polycarbonate oxidises, and oxidation is yellow. It’s the same process that yellows old plastic garden furniture, just on your car.
This isn’t cosmetic trivia. Heavily oxidised lenses can cut light output by 50–80% — the difference between seeing the road and guessing at it on an unlit country lane. And it can fail an MOT: testers check headlight aim and light output, and badly degraded lenses can push a car into failure territory. Restoring them is safety maintenance disguised as cosmetic improvement.
What you’ll need (under £20 total)
- Masking tape (to protect paintwork around the lights)
- Wet-and-dry sandpaper: 800, 1000, 2000 and 3000 grit
- A spray bottle with soapy water
- A plastic polishing compound (or a dedicated headlight restoration kit, £10–£15)
- Microfibre cloths
- A UV sealant — this is the step most people skip and the reason restorations fail
Dedicated kits (3M, Meguiar’s, Autoglym) bundle most of this and work well. The critical component whatever you buy is the final UV sealant: without it, you’re polishing off the last of the factory UV coat and the lens will re-yellow in months, often worse than before.
The method, step by step
1. Mask and clean
Wash the headlights thoroughly, then mask the surrounding paintwork with tape — sandpaper near paint is how restoration jobs become bodywork jobs. Work in shade, not direct sun, so your lubricating water doesn’t evaporate mid-sand.
2. Wet-sand through the grits
Soak the sandpaper, keep the lens wet, and sand in straight lines (not circles) with the 800 grit until the yellow is gone and the lens looks uniformly frosted. This feels wrong — you’re deliberately making it worse — but you’re removing the dead oxidised layer. Then work up through 1000, 2000 and 3000 grit, each stage removing the scratches of the last. Keep everything wet throughout; dry sanding melts the plastic and ruins the finish. Spend most time on the coarsest grit — rushing the 800 stage is the number one cause of disappointing results.
3. Polish to clarity
Apply polishing compound with a microfibre cloth (or a drill-mounted foam pad on low speed if you have one) and work it until the frosted haze clears to transparency. This is the satisfying stage — the lens visibly transforms. Take your time; several applications beat one aggressive one.
4. Seal with UV protection — non-negotiable
Wipe the lens clean with isopropyl alcohol, then apply a UV-resistant sealant or ceramic coating designed for headlights. This replaces the factory UV coat you sanded away. Skip this and you’ll be repeating the whole job within a year; do it and the restoration lasts 2–3 years. Some restorers finish with a proper 2K clear coat for maximum durability — effective, but it demands careful masking and ventilation.
Mistakes that ruin the job
- Skipping grits. Jumping from 800 to 3000 leaves deep scratches the fine paper can’t remove. Every grit in sequence, no shortcuts.
- Toothpaste as polish. The internet’s favourite hack is mildly abrasive and inconsistent — it can improve lightly hazed lenses but won’t fix real yellowing, and it offers zero UV protection.
- Polishing without sanding. If the lens is genuinely yellow (not just hazy), polish alone can’t reach the oxidised layer underneath. Sanding is mandatory for yellow, optional for light haze.
- No UV sealant. Worth repeating: this is why DIY restorations “don’t last”. The sealant is the restoration’s longevity.
- Sanding the inside. If the cloudiness is inside the lens (condensation, failed seals), no amount of external polishing helps — that’s a replacement job.
When restoration isn’t enough
Some lenses are beyond saving: deep cracking (“crazing”) through the plastic, damage from the inside, or previous botched restorations that thinned the lens. Replacement headlight units cost £80–£300+ depending on the car (LED and xenon units are pricier), plus fitting. Before replacing, get a quote for professional restoration (£40–£80 per pair at a detailer) — pros with machine polishers and proper coatings achieve results close to new. For keeping the rest of the car looking sharp, the same patient approach applies to basic DIY maintenance generally — the right tools and no skipped steps. The AA’s driving advice section covers lighting maintenance and legal requirements, useful context for keeping headlights roadworthy.
Prevention: keeping them clear
Once restored (or on a newer car), protect the lenses: apply a UV sealant or wax to the headlights every few months when you wax the car, park in shade or a garage when possible, and wash road film off regularly — grime bakes on in sun and accelerates coating breakdown. A £10 bottle of sealant applied twice a year is all it takes. And if you’re tackling bigger DIY jobs around the house, guides to painting a room like a professional teach the same lesson — preparation is everything.
One more thing worth knowing: headlight restoration pairs naturally with a general front-end refresh. While you’re at it, check the number plate’s readability (a legal requirement — plates must be legible), clean the fog lights, and make sure the headlight washers work if your car has them. A car that looks cared-for at the front tends to be a car that’s been cared-for everywhere, which is exactly the impression you want at MOT time or when it comes to sell.
For the full picture on keeping your car legal and safe, the MOT guidance explains what’s actually tested on lighting — useful context for deciding whether your headlights need attention before the test date.
Conclusion
Yellowed headlights look like an expensive problem and fix like a cheap one: wet-sand through the grits, polish to clarity, and seal with UV protection. An hour’s work and under £20 restores both the looks and — more importantly — the light output your night driving depends on. The only unforgivable mistake is skipping the UV sealant, which turns a lasting fix into a temporary one. Do it right once, maintain it twice a year, and your headlights will stay clear for years.
Frequently Asked Questions
Can I really fix yellow headlights myself?
Yes — wet sanding (800 to 3000 grit), polishing and UV sealing reliably restores most yellowed lenses. The job takes about an hour per pair and costs under £20 in materials.
Will yellow headlights fail an MOT?
They can, if light output or beam pattern is sufficiently degraded. Testers assess headlight performance, and heavily oxidised lenses that severely reduce output can result in failure.
Does toothpaste clean headlights?
Mildly, for light haze — but it can’t fix genuine yellowing and provides no UV protection, so results are temporary. Proper wet sanding and sealing works far better and lasts years.
How long does headlight restoration last?
With proper UV sealant, 2–3 years. Without sealant, often under a year — the unprotected plastic re-oxidises quickly. Reapply sealant every 6–12 months to extend results.
Leave a Reply